Sunday, May 16, 2010

Carved wood text


Step 1

File > New > Document, Create this at 1000px x 400px, black background. Create a new layer
and, choosing two colors, one light, one dark, as fore and background, go to Filter > Render >
Clouds. Filter > Noise > Add Noise > Gaussian / Monochromatic (setting: 9) Filter > Artistic >
Dry Brush (setting: 10 / 10 / 3). You should now have something similar to the image on the left.

Step 2
Filter > Distort > Shear and use the settings shown. This will give you the first step of the planking...

Step 3
We now need to scale our plank to a quarter of its size so Edit > Transform > Scale. Now duplicate the layer three, four or five times and arrange the planking. You can use the Rectangle Marquee tool to crop the planks where they butt up. Now Link all the floorboard layers and use Merged Linked from the Layers flyout menu.

Step 4
On the 'floorboard' Layer using the Layer Styles menu choose Bevel & Emboss > Pillow Emboss
on the default settings.


Step 5
On the channels menu create a New Channel and type your text. (This is used as a reference
layer for text position and also if you later want to use the Filter Lighting Effects.) Then go back to the Layers Panel and you will see your text as a Marquee Selection.


Step 6
Create a new layer and fill the text selection with black. Then Filter > Stylise > Emboss with the setting of 50 / 3 / 500.

Step 7
On the Layer Panel choose either Color Burn or Overlay from the Blending Mode then add a Drop Shadow, of your choice, from the Layer Syles.

Step 8
Your Marquee should still be active so click onto the 'floorboard' Layer. Edit > Copy. Create a
new Layer. Edit > Paste. Now add a Layer Style > Bevel & Emboss: Pillow Emboss / Chisel Hard / 140 / Up / Size 12.

Step 9
Crop your image to size. If you have used Color Overlay in Step 7 then this is the result.

Cargo Container Part 2 - 3D


Step 1:

Well, you have saved out your tga into your own personal working folder in Part 1 and now we are ready to start working in 3D. So open up your 3D software of choice and I will walk you through the basic setup for creating a simple 3D model to apply our cargo container texture too ( * depending on the 3D software you use, some of the things that I explain may not be exactly the same, but they should be relatively close ).

Step 2:
Once you have your software open, I need you to Create > Primitive Polygon > Cube with the following settings (I scaled the polygon cube in the z axis because most cargo containers are not square and moved it up in the y axis so it is sitting on the ground plane X: 0 Y: 0 Z: 0.

Step 3:
With the following settings scale the polygon cube in the z axis because most cargo containers are not square and moved it up in the y axis so it is sitting on the ground plane X: 0 Y: 0 Z: 0.

Step 4:
Now we need to split the front face of the polygon for the cargo container doors. Go to Edit Polygons > Split PolygonsTool ( * remember some tools may be different depending on the software you are using) and split the polygon cube down the middle.

Step 5:
We now need to set up our poly cube’s UV’s (before any polygonal object can be textured, it must have UV information on the surface so that the texture has information to “stick” too. No UV’s = not texture “adhesion” ---in layman terms) to be ready for us to apply the cargo container texture to it. First we select the cargo container doors in face mode (this is a mode that lets you select the polygon object by its component type, in this case we want to select the face component). Once the face is selected, go to EditPolygons > Texture > Planar Mapping []. Depending on which face you have selected, this will determine in which direction you will apply the planar map too. For this case, we selected the face that we split down the middle and projected a planar map down the z axis.


Step 6:
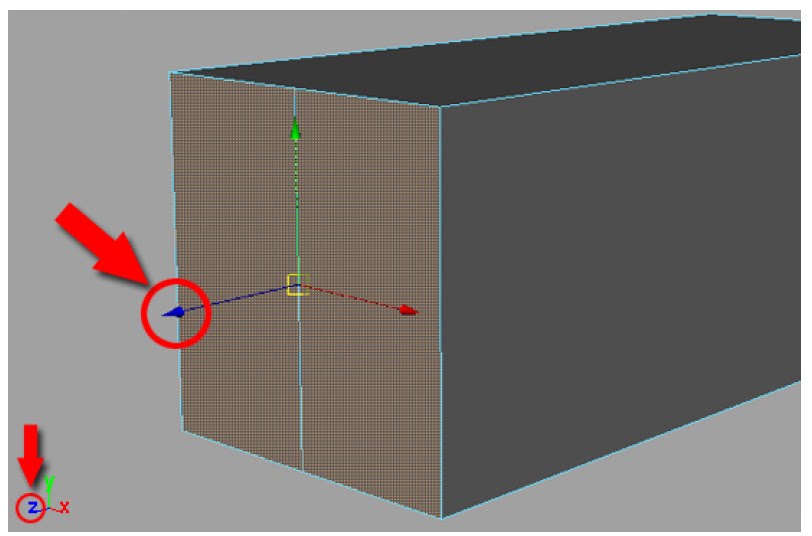
A good way to know which axis you are going to apply a planar map too, is to look at the face when you have it selected and with the move tool selected look at the color of the handles. That color of the handles will represent the direction that particular face is pointing


Step 7:
After applying the planar mapping to all the faces of your cargo container, open up Window > UV Texture Editor and you should have something that looks like this.

Step 8:
Now with the UV’s finished we can now apply the texture that we created to our cargo container. So I need you to open up your material editor, Window > Rendering Editors > Hypershade. Once in the Hypershade, I will have you create a material with a little reflectivity. So in this case, go to
Create > Materials > Phong.


Step 9:
Double click on the Phong that you created to bring up the Attribute Editor of that material. With the Attribute Editor open, click on the create render node for the Color Material Attribute.


Step 10:

In the Create Render Node of the material we need to add a file to the Phong that we created. Select File and this will bring up the Attribute Editor to add the texture that you created to the material. Select the folder icon next to the Image Name and point to the file you created in your working folder.


Step 11:
After the texture is loaded onto the Phong, apply that material to your Cargo Container polygon. You can do this by holding down on your MMB (Middle Mouse Button) and dragging the Phong material onto your polygon.

Step 12:
Well, that is the basic tutorial on how to create a 2D texture in Photoshop and bring it into a 3D application and make it come to life. So feel free to play around with your 3D application and add some additional touches to it…..Don’t be scared, you will not break anything.

Cargo Container: Part 1 - Texturing


Step 1:

Before modeling or texturing anything, it is always a good idea to gather as much reference as possible before you begin. For this lesson, I will be creating a cargo container using Photoshop and any 3D software of your choice will work fine for this. The best references are those that you can actually go out and take pictures of. If you cannot find anything you like, the web is the next best place to look. So you can see here, I have a few pictures to help me visualize what I am going to be creating.

Step 2:
Create a new document (Cargo_Container.psd), 1024x512 pixels with a white background. After looking at the reference we gathered, most of the work for the cargo container can be done with the Rectangular Marquee Tool [M] .

Step 3:
Create a new layer above the background layer and name it Inner Ridges. With the marquee tool selected, draw a rectangle and fill it with 50% neutral gray.


Step 4:
With it still selected, hit Ctrl/Cmd + J to duplicate the image into a new layer. Now hit Ctrl/Cmd + T for the free transform tool and move it to your right (roughly 30 pixels). Now when you used free transform tool, you store that “move” into Photoshop’s memory and all you have to do is make a duplicate layer and hit Ctrl/Cmd + Shift + T and it will remember the previous move. You will do this 30 more times. Just a quick note, it might be a time saver for you to create an action that helps you speed up the process.


Step 5:
At this point you will have a plethora of layers of individual Inner Ridges. Have the first layer selected that you created and link it with all the other layers (except for the Background layer) and in the layers palette, go the pull down tab and select Merge Linked (Ctrl/Cmd + E)

Step 6:
Create a new layer and name it Outer Ridge. Using the marquee tool, create a rectangle covering the majority of the image. When you are done creating your selection, select the inverse of that selection ( Shift + Ctrl/Cmd + I ) and fill that selection with R: 192 G: 192 B: 192.


Step 7:
Select your Background layer and fill it with R: 71 G: 71 B: 71.

Step 8:
Apply these Layer styles to the Inner Ridges layer.

Step 9:
Apply these Layer styles to the Outer Ridge layer.

Step 10:
This is how the cargo container should look after applying all the layer styles to the two different layers.


Step 11:
At this point, I want you take a little artistic freedom into your own hands. I want you to add some shadows, highlights, color (a good trick with color, is adding it as a separate layer and change the layer settings to an overlay, multiply or what works best for the look you are trying to achieve) and some grunge. Have fun with it and go crazy if you want too. And you can see here with mine, I just dirtied it up a little bit and added some little touches.


Step 12:
Save a copy of your file out to your personal working folder as a 24bit TGA. Now after this process, you will be ready to bring your 2D image to life. Go to Part 2.

Black-Background Contact Sheets


STEP 1

File> Automate> Contact Sheet II. In the Contact Sheet dialog box, select the folder from which you want to generate the sheet and uncheck the box "Flatten All Layers." Click the OK button to generate the contact sheets.

STEP 2
Once the contact sheet is generated, press D on the keyboard to set black as the foreground color. (You could, of course, use any color.) In the Layers palette, click on the layer "Background" to make it the active layer. Press Option-Delete (Mac) or Alt-Backspace (Windows) to fill the layer with black.

STEP 3
If you added the file name as a caption, it's now invisible. In the Layers palette, click on any type layer to make it the active layer. Link all the other type layers to the active layer. While keeping the Shift key depressed, change the type color in the Character palette to white (or any other light color). Using the Shift key enables you to convert all the linked type layers at the same time. You can now flatten the contact sheet, if desired.

Saturday, May 15, 2010

Beach Scene


Step 1:

First create a new 500 pixel by 500 pixel canvas. Then create a new layer on top of the background for our sand. Create a selection with the lasso tool or the pen that is similar to mine.

Step 2:
Now make your foreground color R:242 G:240 B:187 and your background color R:203 G:198 B:154. Select the gradient tool and make sure you have the linear gradient type selected. Select the foreground to background option. Drag a gradient out in the direction that I have shown here.

Step 3:
Next, create a layer below the sand. This will be our sky.

Step 4:
Make your foreground color R:176 G:241 B:255 and your background color R:0 G:186 B:255. Select the linear gradient tool again and drag a gradient similar to what I have here. Again, make sure foreground to background is selected as the gradient type.


Step 5:
Now create a new layer ABOVE the sky layer but BELOW the sand layer. Create a selection similar to this one. This will be our ocean.


Step 6:
Make your foreground color R:0 G:168 B:255 and your background color R:125 G:221 B:255. Once again, select the linear gradient tool and create another gradient for the water.


Step 7:
It should be looking good so far and you could probably leave it alone. The water looked a little plane to me so I wanted to add a little realism. Create a new layer on top of the water layer. Ctrl + click on the water layer to get its selection active and fill it on the new layer with black. You shouldn't be able to see the water for now.

Step 8:
Now go to Filter->Noise->Add Noise. Use these settings to add some noise. (Amount: 34%, Gaussian, and Monochromatic checked) Then go to Filter->Blur->Motion Blur. Set the angle at 0 and 18 for the distance. Finally, to finish the highlights set the layer blend mode to screen to take away all of the black and show the white only.


Step 9:
Well, thats almost it. You could create a sun by creating a circular selection and filling it with yellow. Then add a outer glow layer style to it.


Step 10:
Finally, here is an idea of some more things you could do with this effect.

American Flag


Step 1:

Create a new 500 x 300 pixel 72 dpi canvas in Photoshop. Be sure, at this point, you only have one layer named "background" and that its filled with white.


Step 2:
Select the Custom Shape Tool. It is located within the Shape Tools flyout in the Toolbar.

Step 3:
Next, click the small down arrow next to the Shape area in the options bar to pick a custom shape. By default, you may not have the US Flag shape showing. However, if you click the options arrow to the right of the palette and select Objects, then click "Append" if Photoshop asks if you would like to replace the current shapes. Now you should see the US Flag custom shape.


Step 4:
Now you're ready to draw your shape. The first step is to be sure that the Paths button is clicked in the options bar. We don't want to actually create any pixels yet.


Step 5:
Set your foreground color to black by pressing D. Hold down the Shift key to constrain the flag's proportions and draw a shape that spans the exact size of the canvas. You can use the spacebar to move the flag shape around before you actually release your mouse button to help you position it correctly.


Step 6:
Move over to the Paths palette. You should have one "Work Path" layer in it at this point. Click the Load Path as Selection button at the bottom of the palette to turn this path into a selection.


Step 7:
Now go back to the layers palette and create a new layer named COLOR. With the selection still active, fill it with R:255 G:0 B:0 on the new layer.

Step 8:
Now lock the COLOR layer by clicking the Lock Transparent Pixels button toward the top left of the Layers palette.


Step 9:
OK, we're almost done. Now Zoom in on the star area within the flag. Using the Rectangular Marquee Tool to put a rectangular selection around the rectangle that holds the starts.


Step 10:
Set your foreground color to R:0 G:0 B:255 and press Alt/Option + Backspace to fill the selection with blue. There you have it - an American flag.

All about cropping


Crop to the subj
ect matter

It only takes a few seconds to crop your images, so as to better focus on the subject
matter and eliminate unwanted bits. Focus on the subject matter, and get in as close as
you can. This not only makes the image look better, but it reduces the file size as well.

Step 1:
Open the image, and press C to access the Crop tool.

Step 2:
Draw a selection box around the area you want to crop, using the handles on all four corners to make adjustments. To move the entire crop selection box, place your mouse inside the box, then click, hold, and drag.

Step 3:
Press Return to accept the crop. Note: To abandon the crop altogether, simply press the Escape key.


Cropping to a specific size


If you know the target resolution and size of the image you want to create, you can dial that information directly into Photoshop. Let’s say that you have an image you want to print at 4x6 on an inkjet printer which can read 360 dpi.

Step 1:
Open the image, and press C for the Crop tool.

Step 2:
In the toolbar at the top of your screen, you’ll see text input boxes for width, height, and resolution. In the width box, type: 4 in. Then in the height box, type: 6 in. (yes, you MUST include the unit of measurement!). In the resolution box, type: 192 (it's not necessary to type in pixels here). Note: To zero out these numbers at any time, simply press the Clear button on the right of this same toolbar.

Step 3:
Draw a selection box around the subject matter in the image. See how Photoshop constrains the selection box to the numbers you dialed in?


Step 4:
Adjust the crop box by tugging on any of the four corner handles as necessary. Press Return to accept the crop.


Using the crop tool to increa
se canvas size

Need more canvas space instantly? Follow these steps and you may never trek to the Image menu and Canvas Size dialogue box again:

Step 1:
Open the image, and press F to go to Full Screen Mode (so that you have a larger workspace).

Step 2:
On the Layers palette, make sure that the layer on which the image lives is NOT named "Background." If it is, simply double click the layer to rename it. This ensures that your new canvas space is transparent, giving you more flexibility with the image (think drop shadows, borders, edge effects, etc.).


Step 3:
Press C to select the Crop tool.

Step 4:
Draw a random sized selection box.

Step 5:
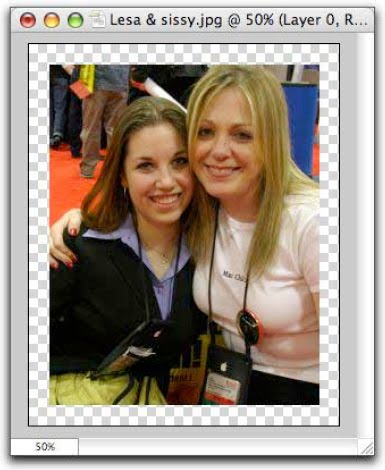
Grab each corner handle of your selection box and drag it out onto the gray

Step 6:
Press return and voila! Enjoy your new canvas space :) area, outside of the image bounds, Wherever you need the extra space.