Step 1:
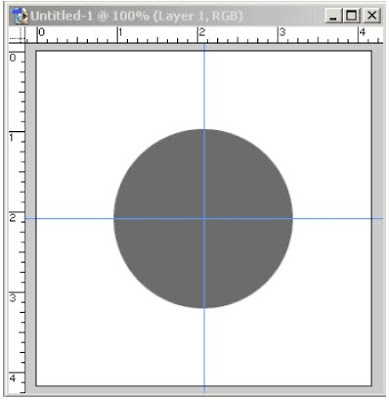
Create a new document that is 500 x 500 pixels in size. Hit Ctrl + R to turn on your rulers or go to View->Rulers. Also hit Ctrl + Shift + ; to turn Snap on or go to View->Snap. Now drag two guides out - 1 from the top and one from the bottom. Notice that as you approach the center of the canvas the guides will try to snap themselves to the center point. This is a good thing - just slow down your drag as you get to the center and allow the guides to snap into place.
Step 2:
Next, create a new layer and use the marquee tool to create a circle. Fill it with gray. This will serve as a reference point for what you want to wrap your smaller objects around. Position this circle in the center of the canvas. Again as you drag it, the center of the circle should snap to the intersection of the 2 guides.
Step 3:
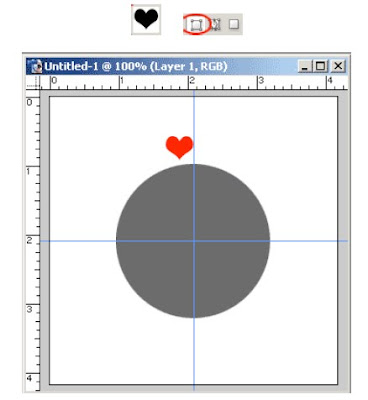
OK, now go to the Custom Shapes palette and choose the heart shape . Make sure you have this option selected in the top toolbar. Now create a small heart on the canvas like I have here.
Step 4:
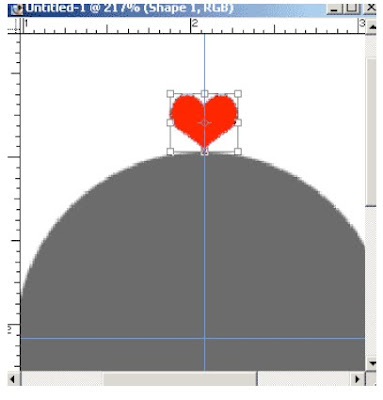
OK, now zoom in on the heart and top half of the circle. Hit Ctrl + T to bring up the free transform tool. Move the heart so it is perfectly in the center of the guide. It should snap into place with the center point of the heart's bounding box.
Step 5:
Now hit Ctrl + J to create a copy of the heart layer. Then, hit Ctrl + T to bring up the Free transform again on that copy. Notice the small circle in the center - it looks like this . Hold down Shift and click and drag that down to the center point of the large circle. Right where the two guides meet. See my zoomed in picture below.
Step 6:
Now, don't hit Enter yet. Move your mouse back up to the bounding box around the heart. Move it just outside of the bounding box until you see the little curved arrow. Now click and drag to rotate the heart into a position you desire. Holding Shift down while you do this can help snap it into a good place as well. Hit Enter to confirm your changes when you're happy with the result. You can always hit the Escape key to get yourself out of Free Transform mode too.
Step 7:
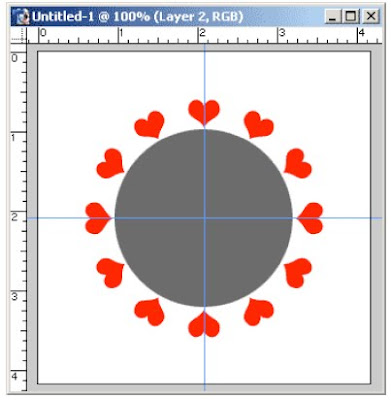
Now the rest is simple. Just take your "Claw" (a.k.a. Hand) and hold down Ctrl + Shift + Alt and hit the T key repeatedly. Watch in awe as hearts appear before your eyes perfectly around the circle.
Step 8:
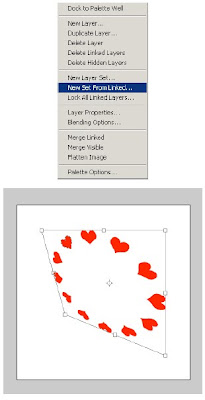
Finally, you can turn off the circle layer. Link all of your heart layers together and go to the layers palette menu and select "New Set From Linked...". This will put them all into one layer set. Now you can hit Ctrl + T on that layer set and move all of them if you like. Resize, skew, do whatever. They are still all vector shapes and will retain their quality no matter what you do. Below is a picture of how I linked them all together and skewed all of them at once. They are still vectors though so I won't loose any image quality like I would if I rasterized them.
No comments:
Post a Comment