Step 1
File > New > Document, Create this at 1000px x 400px, black background. Create a new layer
and, choosing two colors, one light, one dark, as fore and background, go to Filter > Render >
Clouds. Filter > Noise > Add Noise > Gaussian / Monochromatic (setting: 9) Filter > Artistic >
Dry Brush (setting: 10 / 10 / 3). You should now have something similar to the image on the left.
Step 2
Filter > Distort > Shear and use the settings shown. This will give you the first step of the planking...
Step 3
We now need to scale our plank to a quarter of its size so Edit > Transform > Scale. Now duplicate the layer three, four or five times and arrange the planking. You can use the Rectangle Marquee tool to crop the planks where they butt up. Now Link all the floorboard layers and use Merged Linked from the Layers flyout menu.
Step 4
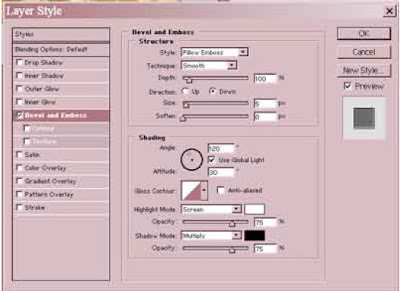
On the 'floorboard' Layer using the Layer Styles menu choose Bevel & Emboss > Pillow Emboss
on the default settings.

Step 5
On the channels menu create a New Channel and type your text. (This is used as a reference
layer for text position and also if you later want to use the Filter Lighting Effects.) Then go back to the Layers Panel and you will see your text as a Marquee Selection.

Step 6
Create a new layer and fill the text selection with black. Then Filter > Stylise > Emboss with the setting of 50 / 3 / 500.
Step 7
On the Layer Panel choose either Color Burn or Overlay from the Blending Mode then add a Drop Shadow, of your choice, from the Layer Syles.
Step 8
Your Marquee should still be active so click onto the 'floorboard' Layer. Edit > Copy. Create a
new Layer. Edit > Paste. Now add a Layer Style > Bevel & Emboss: Pillow Emboss / Chisel Hard / 140 / Up / Size 12.
Step 9
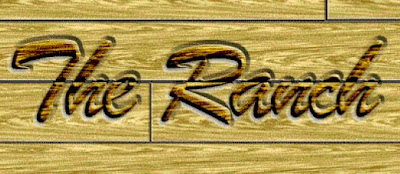
Crop your image to size. If you have used Color Overlay in Step 7 then this is the result.

No comments:
Post a Comment