Step 1:
Find a suitable photograph.
Step 2:
Next, duplicate the photograph layer so you have two of them.
Step 3:
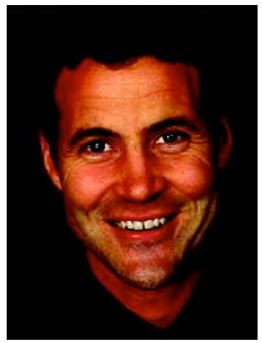
Change the Blend Mode of the top duplicate to Linear Burn. When it comes to skin, this Blend mode will do exactly what its name says - burn. You subject should look as if he's got a bad sunburn right now. Ouch! He Should've used sun block.

Step 4:
Next reduce the opacity of the Linear Burn layer to about 25%. The skin looks a little better now.

Step 5:
Now we need to only apply the linear burn blend mode to the skin - not the cloths and background. So, add a layer mask to the Linear Burn layer. Paint with black over the background, cloths, eyes and teeth. This can take some time depending on the complexity of your photograph..
Step 6:
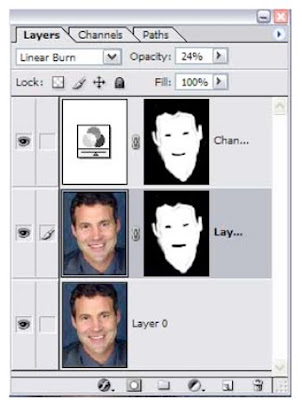
Next, this step is optional. Your photograph may look ok as it is. However, I felt this one had a bit too much of a red tint. If this happens, Ctrl/Cmd + Click on the layer mask to put a selection around all that is white. With that selection active, click the half black/half white circle at the bottom of the layers palette and add a Channel Mixer adjustment layer. Your layers palette should now look like this.

Step 7:
Bring the red slider down slightly as I have in this reference image. Also, it may help to bring the Green down slightly as well. You'll have to experiment a little with it as each photograph is different.
Step 8:
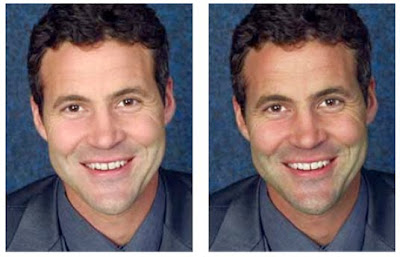
That's it. The person in your photograph should now a bit more color to their skin. You can see the difference when they are side by side.

Step 9:
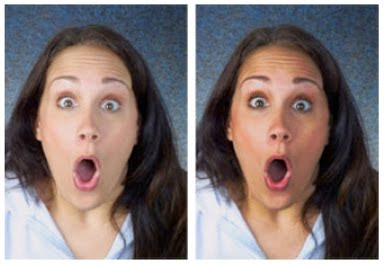
Here's another photo that this technique worked well on. However, I didn't need to use a Channel Mixer adjustment layer as described in step 6 for this one.

No comments:
Post a Comment