Step 1:
To get started you will need a photo of someone that you really want to pick on.
Step 2:
Next, we need to create a custom brush. Create a new file that is 200 x 200 pixels in size. Swapping between a 1 and 3 pixel hard edge brush, paint some random hair lines as you see in this reference image.
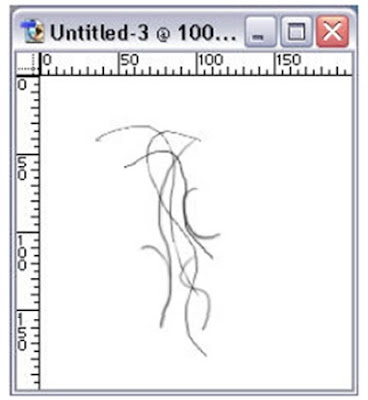
Step 3:
Hit Ctrl/Cmd + A to put a selection around the entire canvas. Choose Edit > Define Brush. Our custom brush is now created.
Step 4:
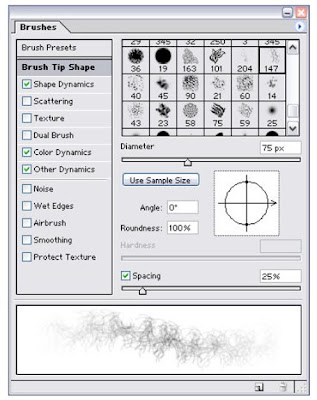
Now open the advanced Brush palette by choosing Window > Brushes. Select your new brush. Then, make your settings similar to this reference image.
Step 5:
Select the Shape Dynamics checkbox. Change the settings to look like this.
Step 6:
Do the same for Color Dynamics.
Step 7:
And finally, Other Dynamics.
Step 8:
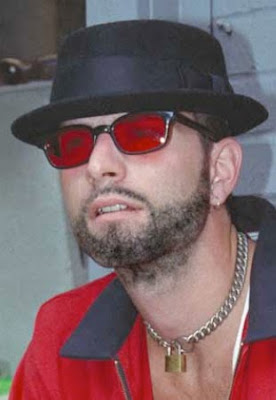
Set your foreground color to black and create a new layer on top of your photo. Begin to paint in a beard similar to the way I have here. When you get around the mustache area I suggest you decrease the diameter of your brush. The left and right bracket ([ ]) keys are always a good shortcut for this but you can always go back into the brush palette and change the master diameter setting there.
Step 9:
Great. Not very realistic though is it? The key to this effect is layers. Black is a good base layer but now we need to build it up. Create a new layer on top of the Black hair layer. Select a brown as your foreground color. I chose R:106 G:87 B:80. Now paint on the beard and start building it up a bit. However, don't paint as much as you did with the black at this stage.
Step 10:
If your photo candidate (A.K.A. Victim) has any gray hair, this would be a great place to create a new layer and paint some gray hair in too. Mine doesn't but this is the time to add it if needed.
Step 11:
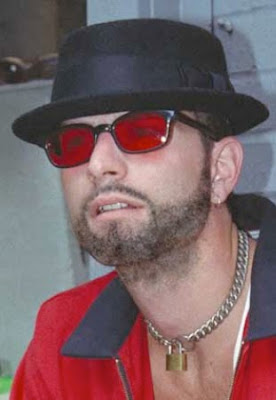
OK, looks good but its still a little flat and unrealistic. To fix this, create a new layer on top of the rest. Change the blending mode of this layer to Color Dodge and set the opacity of this layer to around 40 - 50%. Select a light brown color (R: 115 G:69 B:51) for your foreground color and paint some highlights in along the edges.
Step 12:
If your image is like mine, there are a few places where the hair doesn't look in place (around the lips and upper cheek area). Or you may wish to adjust it a little and reshape the beard. The best way I've found to do this is to select the Eraser tool. Then choose brush for the Mode setting and select our custom hair brush that we created. This avoids giving harsh edges to the erased areas. Modify the diameter down to around 25 but this may vary depending on your image. Now erase the areas that don't look quite right to you. Don't forget you've drawn on 3 layers so far so you may need to erase on more than one layer.
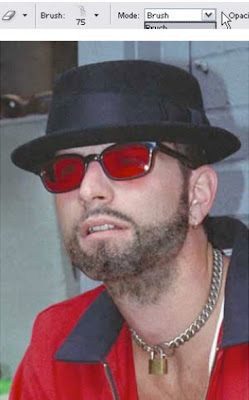
Step 13:
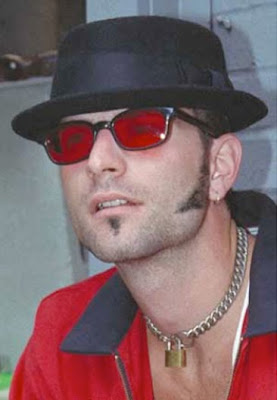
Also, this effect isn't limited to beards only. Obviously you could just create a mustache or even a goat tee.
Step 14:
For the goat tee image I scaled the custom brush way down to 10 pixels. Then I followed basically the same steps as above. This process is a little more detailed and will probably take more time though so be patient.
Step 15:
Heck you could even add a uni-brow too! My victim is wearing sunglasses so I can't, but some nice extended sideburns looks good too.
No comments:
Post a Comment