Find a suitable photograph from which to create this effect. Some tips when picking a photograph include a distinguishable background and an area within the photograph that extrudes beyond the normal outline of the photo. In my example, the dog's leg makes this photograph a perfect candidate for this technique. Note, that this photograph is image #0520011 from Photospin.com. You can download a low resolution comp to follow along with this tutorial from their website.
Step 2:
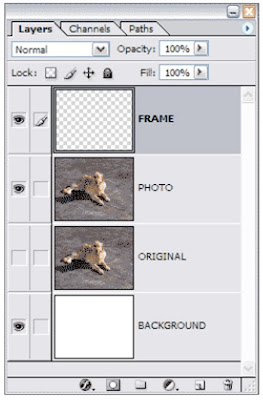
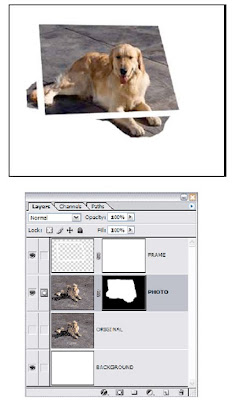
First things first. Set up your layers palette to get things going. You should have
something similar to mine here. Note that I have added a blank layer named FRAME on top of the PHOTO layer and created a backup of my original photo.
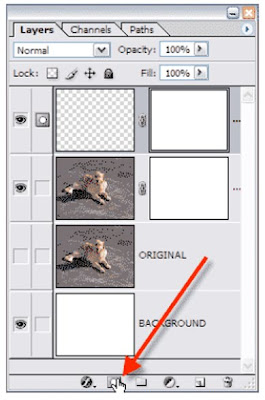
Step 3: Now add a layer mask to the PHOTO and FRAME layers.
Step 4:
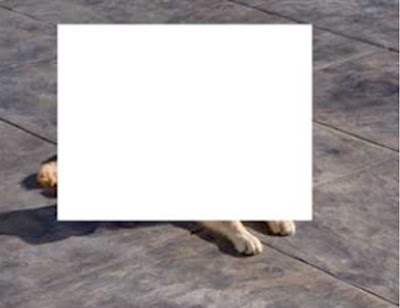
Next, on the FRAME layer, draw a white rectangular frame by first creating a rectangle with the Rectangular Marquee Tool as in this image. Then fill it with White. Don't deselect yet though.
Step 5:
Now choose Select > Contract and enter 20 pixels. Then hit delete to remove this area from the white rectangle.
Step 6:
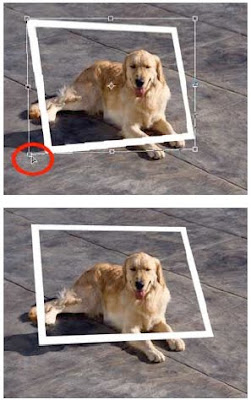
Press Ctrl/Cmd + T to display the Free Transform bounding box. Skew the frame to add some perspective to it so it looks somewhat 3D. You can do this by holding down the Ctrl/Cmd key and dragging each corner of the bounding box individually.
Step 7:
Choose the Brush tool and select a brush similar to the one shown here.
Step 8:
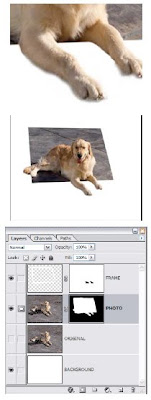
Next, click on the Layer mask on the PHOTO layer to activate it. Set your foreground color to black and paint in the areas that extends outside of the rectangle. However, don't paint over the leg area just yet.
Step 9:
Now zoom in on the dog's leg. Just as in step 7, paint with black on the same layer mask around the dogs leg. You'll probably need to choose a smaller brush and zoom in and out several times to get this right. This is very detailed masking so be sure to spend some time on this step as it'll make the end result much nicer. TIP: Don't forget to use the shortcut keys to make your paintbrush larger or smaller - they are the bracket keys [ ] and can save you a heep of time.
Step 10:
Once the masking of the PHOTO layer is done, click on the FRAME layer's mask to activate it. Use a small brush to paint over (with black) the area of the frame that you don't want to show over the dog.
Step 11:
Then add a drop shadow layer style by double clicking on the FRAME layer. Enter the following settings.
Step 12:
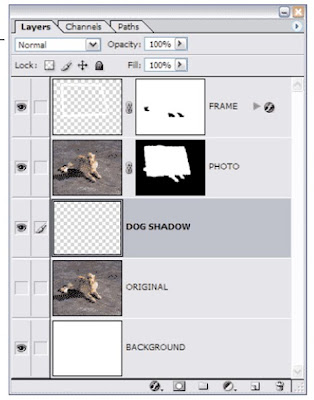
Create a new layer below the PHOTO layer named DOG SHADOW.
Step 13:
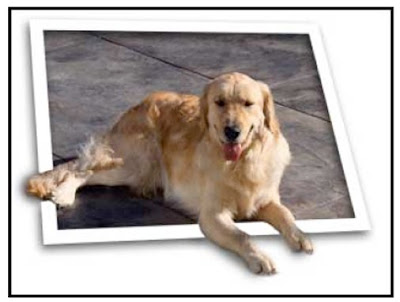
Select a very soft brush and paint a slight shadow near the dogs legs to match the drop shadow around the frame. You may need to decrease the opacity of the DOG SHADOW layer or brush to get a better match. Also, if you find your shadow is too harsh, try running the Gaussian Blur filter on it (Filter > Blur > Gaussian Blur).
No comments:
Post a Comment