Monday, May 17, 2010

Crome Layer Style


Step 1:

Open a new document. Mine is about 300 x 300 pixels in size. Then create an element that you wish to chromize (is that even a word?). The one "gotcha" with layer styles is that they can look very different on various shapes. A style that looks good on text may look horrible on a solid shape like a circle. For this effect I've found that thick text or a logo shaped similar to mine here works best. So go ahead and create whatever shape you choose on a new layer by itself.

Step 2:
Now apply the following layer styles that I have in the screenshots below. Take note of any color swatch changes in the inner glow and satin layer styles as well as any contour changes that I have done. They all ship with Photoshop 7 - you just need to pick it from the list.

Step 3:
OK, now you should have something like this.


Step 4:

You're probably thinking that this doesn't look very good. Well here is the last tip. I've also found that many of the default blend modes used in the layer styles really hinder us. Sometimes I let them fool me into thinking that the default is the way that the layer style should look best. But often, the real power of layer styles shows through when you change these defaults as is the case with this effect. So with nofurther ado... simply go to the Satin layer style that you created and change the default blending mode of multiply to screen. Then sit back and watch magical things happen (hopefully).

Changing Scenery


Step 1:

Find an image that you want to make gloomy. For the first time through, its probably best to use this one and follow along. I've also sized it down considerably so the file sizes aren't too big.

Step 2:
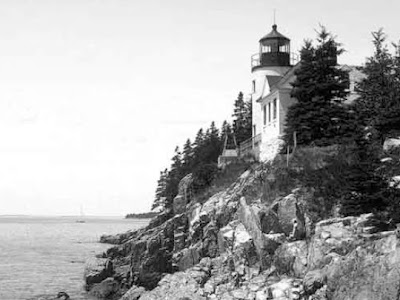
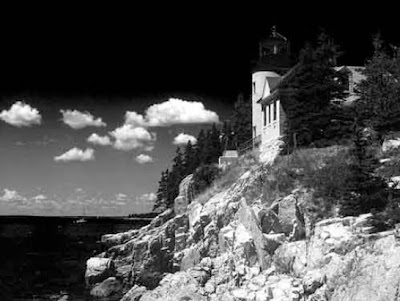
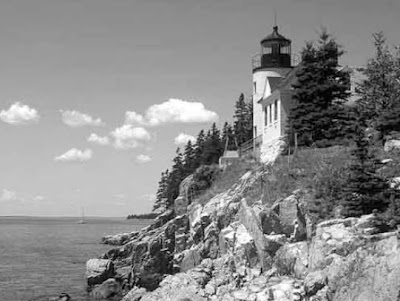
Now, our first step is going to be selecting the sky out from the landscape. This is probably the hardest part but one of the most important. So, I'll start by going to go into my channels palette and click thru the red, green, and blue channels to see what we've got. We're looking for something with good contrast between the sky and landscape.
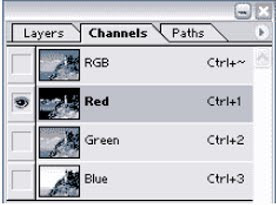


Channels Palette:
Red:


Green:


Blue:


Step 3:
Ok, by clicking on each channel I find that the blue channel offers me the best contrast for this picture so thats where we'll start. Select that channel and hit Ctrl + A to put a selection around the entire image. Now copy it, go back to your layers palette and create a new layer, and paste it into that layer. Your layers palette should look like this so far.

Step 4:
OK, now run a levels command (Ctrl + L) on the new channel. Drag the left slider over to the right until your picture looks something like mine. We're trying to increase the amount of contrast here and make the blacks blacker.

Step 5:
Now for a little manual labor. It can't all be automatic, sometimes we must work for it a little. So,grab your rectangular marquee and put a selection around the water like I have an fill it with black. Also, do the same for the lighthouse. These are areas that we can tell ahead of time will be problems if we try to use an automatic tool like the extract filter which we'll see next. Anyway, you should have something like mine - I've filled my selections with red so you can see what I've done.

Step 6:
Next, go to Filter->Extract. Select a 30 pixel brush and leave the other settings at their default. Draw around the edge for the trees and lighthouse, keeping about half of the brushes width on the part you want to keep and the other half around the sky. Then select the paint bucket (in the extract tool still) and fill the landscape area by clicking on it. You should have something like my picture here. Click OK when you're done.

Step 7:
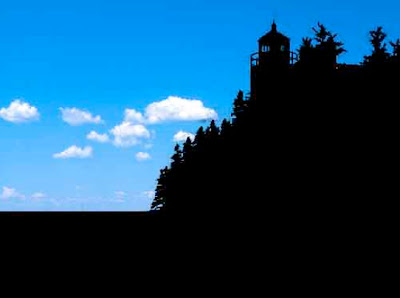
OK, now we have selected out our sky and we're almost there. Ctrl + click on the layer that you just extracted to select whats left. Then fill it with black so there is no white left. Don't deselect just yet though.


Step 8:
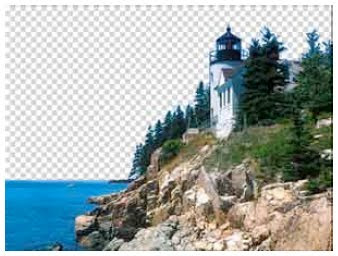
Now we have our mask. With the selection still active, hide your mask layer, select your image layer, hit Ctrl+Shift+I to select the inverse (the sky in this case) and hit delete. You should have something like this. (Note: I had to size this down so I could save it as a gif and show the transparency. The file would have been huge if I didn't)


Step 9:
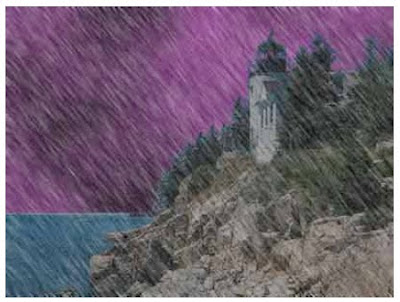
OK, now that we have our image we can start adding the gloominess. First, lets put a new layer below the lighthouse layer for our clouds. Every storm needs clouds right? Now select black for your foreground color and a dark blue or purple color for your background color. I used this color RGB(153:51:153). Then goto Filter->Render->Clouds. You should have something like this now.

Step 10:
Now that we have clouds, its time to add rain. So create a new layer on top of all the others and fill it with black. Then goto Filter->Noise->Add Noise. For the amount use 37. Check Gaussian and monochromatic too. Now blur it slightly by going to Filter->Blur->Gaussian Blur and enter 0.5 pixels for the radius.

Step 11:
Next, hit Ctrl+L to bring up the Levels adjustment. Move your sliders so they look like mine below.


Step 12:
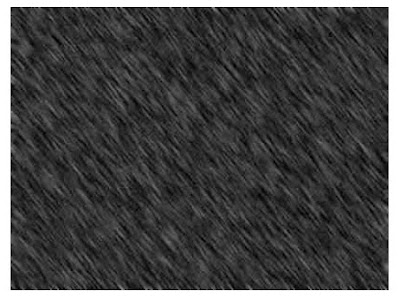
Finally, to make it look like driving rain we need to angle it a bit. Go to Filter->Blur->Motion Blur and enter in -53 for the angle and 15 for the distance. Feel free to customize these settings to get a different effect.


Step 13:

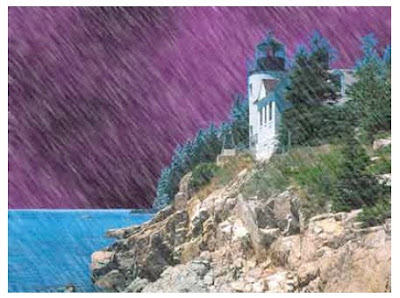
Now to finish off the rain, select the layer in the layers palette and change its blend mode to screen.


Step 14:
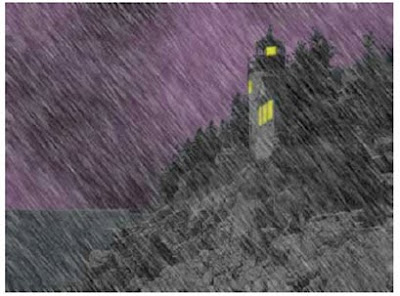
OK, that almost completes the effect but we have a few things to finish up with. First, if you notice the mountains and lighthouse are still way too bright. They still look as if it were a sunny day. Have no fear though, photoshop can take care of that one easily. Just select the landscape layer and hit Ctrl+U to bring up the hue saturation dialog box. Enter in 0 for hue, -70 for saturation and -70 for lightness. That should darken it up just fine.


Step 15:
Finally to fully complete the effect, lets add some lights in the lighthouse to make it look a little more eary. Create a new layer on top of the landscape layer but below the rain layer. Zoom in on the windows and use the Polygonal Lasso tool to make selections around each window. Fill each one with yellow on that and use the Polygonal Lasso tool to make selections around each window. Fill each one with yellow on that new layer. Then run the Filter->Blur->Gaussian blur filter on it with a setting around 0.7 - 1 pixel for the radius.

Step 16:
OK, that almost completes the effect but we have a few things to finish up with. First, if you notice the mountains and lighthouse are still way too bright. They still look as if it were a sunny day. Have no fear though, photoshop can take care of that one easily. Just select the landscape layer and hit Ctrl+U to bring up the hue saturation dialog box. Enter in 0 for hue, -70 for saturation and -70 for lightness. That should darken it up just fine.
Chalkboard


Step 1:

Start out with a blank canvas. 500 x 500 pixels should work fine. Fill your background with this color - #4D6B44.

Step 2:
Now, select the brush tool and open your brush palette (Window->Brushes). The brush I'm going to use ships with Photoshop. Its called "Spatter 14 pixels". See my screenshot below for a preview.


Step 3:
Now make sure you have brush tip shape selected on the left side of the brush palette and make your settings similar to mine here.


Step 4:
Now select "Shape Dynamics" and change your settings to match mine.


Step 5:
OK, you now have your brush (or chalk). Its time to write. There are a few ways you could do this. The first and easy way is if you have a pen tablet. Just create a new layer, select the brush tool and start writing on the canvas. You can do this with a mouse but it is much more difficult to write legibly. This gives you that real handwritten look on the blackboard.

Step 6:
The second more difficult way is to add some text on a new layer like I have here.


Step 7:
Then go to Layer->Type->Create Work Path. This will create a new work path in your paths palette from your text. Then hide your text layer and create a new layer on top of it. Make sure the brush tool is selected (with your new brush of course) and go to the Path's Palette. Click on the text work path and click the stroke path button at the bottom of the palette. It should leave you with something like this.

Step 8:
Either way is cool I think and they can both have their advantages depending on the look you're going for. Here is something that I created that made the task a little more fun.

Sunday, May 16, 2010

Carved wood text


Step 1

File > New > Document, Create this at 1000px x 400px, black background. Create a new layer
and, choosing two colors, one light, one dark, as fore and background, go to Filter > Render >
Clouds. Filter > Noise > Add Noise > Gaussian / Monochromatic (setting: 9) Filter > Artistic >
Dry Brush (setting: 10 / 10 / 3). You should now have something similar to the image on the left.

Step 2
Filter > Distort > Shear and use the settings shown. This will give you the first step of the planking...

Step 3
We now need to scale our plank to a quarter of its size so Edit > Transform > Scale. Now duplicate the layer three, four or five times and arrange the planking. You can use the Rectangle Marquee tool to crop the planks where they butt up. Now Link all the floorboard layers and use Merged Linked from the Layers flyout menu.

Step 4
On the 'floorboard' Layer using the Layer Styles menu choose Bevel & Emboss > Pillow Emboss
on the default settings.


Step 5
On the channels menu create a New Channel and type your text. (This is used as a reference
layer for text position and also if you later want to use the Filter Lighting Effects.) Then go back to the Layers Panel and you will see your text as a Marquee Selection.


Step 6
Create a new layer and fill the text selection with black. Then Filter > Stylise > Emboss with the setting of 50 / 3 / 500.

Step 7
On the Layer Panel choose either Color Burn or Overlay from the Blending Mode then add a Drop Shadow, of your choice, from the Layer Syles.

Step 8
Your Marquee should still be active so click onto the 'floorboard' Layer. Edit > Copy. Create a
new Layer. Edit > Paste. Now add a Layer Style > Bevel & Emboss: Pillow Emboss / Chisel Hard / 140 / Up / Size 12.

Step 9
Crop your image to size. If you have used Color Overlay in Step 7 then this is the result.

Cargo Container Part 2 - 3D


Step 1:

Well, you have saved out your tga into your own personal working folder in Part 1 and now we are ready to start working in 3D. So open up your 3D software of choice and I will walk you through the basic setup for creating a simple 3D model to apply our cargo container texture too ( * depending on the 3D software you use, some of the things that I explain may not be exactly the same, but they should be relatively close ).

Step 2:
Once you have your software open, I need you to Create > Primitive Polygon > Cube with the following settings (I scaled the polygon cube in the z axis because most cargo containers are not square and moved it up in the y axis so it is sitting on the ground plane X: 0 Y: 0 Z: 0.

Step 3:
With the following settings scale the polygon cube in the z axis because most cargo containers are not square and moved it up in the y axis so it is sitting on the ground plane X: 0 Y: 0 Z: 0.

Step 4:
Now we need to split the front face of the polygon for the cargo container doors. Go to Edit Polygons > Split PolygonsTool ( * remember some tools may be different depending on the software you are using) and split the polygon cube down the middle.

Step 5:
We now need to set up our poly cube’s UV’s (before any polygonal object can be textured, it must have UV information on the surface so that the texture has information to “stick” too. No UV’s = not texture “adhesion” ---in layman terms) to be ready for us to apply the cargo container texture to it. First we select the cargo container doors in face mode (this is a mode that lets you select the polygon object by its component type, in this case we want to select the face component). Once the face is selected, go to EditPolygons > Texture > Planar Mapping []. Depending on which face you have selected, this will determine in which direction you will apply the planar map too. For this case, we selected the face that we split down the middle and projected a planar map down the z axis.


Step 6:
A good way to know which axis you are going to apply a planar map too, is to look at the face when you have it selected and with the move tool selected look at the color of the handles. That color of the handles will represent the direction that particular face is pointing


Step 7:
After applying the planar mapping to all the faces of your cargo container, open up Window > UV Texture Editor and you should have something that looks like this.

Step 8:
Now with the UV’s finished we can now apply the texture that we created to our cargo container. So I need you to open up your material editor, Window > Rendering Editors > Hypershade. Once in the Hypershade, I will have you create a material with a little reflectivity. So in this case, go to
Create > Materials > Phong.


Step 9:
Double click on the Phong that you created to bring up the Attribute Editor of that material. With the Attribute Editor open, click on the create render node for the Color Material Attribute.


Step 10:

In the Create Render Node of the material we need to add a file to the Phong that we created. Select File and this will bring up the Attribute Editor to add the texture that you created to the material. Select the folder icon next to the Image Name and point to the file you created in your working folder.


Step 11:
After the texture is loaded onto the Phong, apply that material to your Cargo Container polygon. You can do this by holding down on your MMB (Middle Mouse Button) and dragging the Phong material onto your polygon.

Step 12:
Well, that is the basic tutorial on how to create a 2D texture in Photoshop and bring it into a 3D application and make it come to life. So feel free to play around with your 3D application and add some additional touches to it…..Don’t be scared, you will not break anything.

Cargo Container: Part 1 - Texturing


Step 1:

Before modeling or texturing anything, it is always a good idea to gather as much reference as possible before you begin. For this lesson, I will be creating a cargo container using Photoshop and any 3D software of your choice will work fine for this. The best references are those that you can actually go out and take pictures of. If you cannot find anything you like, the web is the next best place to look. So you can see here, I have a few pictures to help me visualize what I am going to be creating.

Step 2:
Create a new document (Cargo_Container.psd), 1024x512 pixels with a white background. After looking at the reference we gathered, most of the work for the cargo container can be done with the Rectangular Marquee Tool [M] .

Step 3:
Create a new layer above the background layer and name it Inner Ridges. With the marquee tool selected, draw a rectangle and fill it with 50% neutral gray.


Step 4:
With it still selected, hit Ctrl/Cmd + J to duplicate the image into a new layer. Now hit Ctrl/Cmd + T for the free transform tool and move it to your right (roughly 30 pixels). Now when you used free transform tool, you store that “move” into Photoshop’s memory and all you have to do is make a duplicate layer and hit Ctrl/Cmd + Shift + T and it will remember the previous move. You will do this 30 more times. Just a quick note, it might be a time saver for you to create an action that helps you speed up the process.


Step 5:
At this point you will have a plethora of layers of individual Inner Ridges. Have the first layer selected that you created and link it with all the other layers (except for the Background layer) and in the layers palette, go the pull down tab and select Merge Linked (Ctrl/Cmd + E)

Step 6:
Create a new layer and name it Outer Ridge. Using the marquee tool, create a rectangle covering the majority of the image. When you are done creating your selection, select the inverse of that selection ( Shift + Ctrl/Cmd + I ) and fill that selection with R: 192 G: 192 B: 192.


Step 7:
Select your Background layer and fill it with R: 71 G: 71 B: 71.

Step 8:
Apply these Layer styles to the Inner Ridges layer.

Step 9:
Apply these Layer styles to the Outer Ridge layer.

Step 10:
This is how the cargo container should look after applying all the layer styles to the two different layers.


Step 11:
At this point, I want you take a little artistic freedom into your own hands. I want you to add some shadows, highlights, color (a good trick with color, is adding it as a separate layer and change the layer settings to an overlay, multiply or what works best for the look you are trying to achieve) and some grunge. Have fun with it and go crazy if you want too. And you can see here with mine, I just dirtied it up a little bit and added some little touches.


Step 12:
Save a copy of your file out to your personal working folder as a 24bit TGA. Now after this process, you will be ready to bring your 2D image to life. Go to Part 2.

Black-Background Contact Sheets


STEP 1

File> Automate> Contact Sheet II. In the Contact Sheet dialog box, select the folder from which you want to generate the sheet and uncheck the box "Flatten All Layers." Click the OK button to generate the contact sheets.

STEP 2
Once the contact sheet is generated, press D on the keyboard to set black as the foreground color. (You could, of course, use any color.) In the Layers palette, click on the layer "Background" to make it the active layer. Press Option-Delete (Mac) or Alt-Backspace (Windows) to fill the layer with black.

STEP 3
If you added the file name as a caption, it's now invisible. In the Layers palette, click on any type layer to make it the active layer. Link all the other type layers to the active layer. While keeping the Shift key depressed, change the type color in the Character palette to white (or any other light color). Using the Shift key enables you to convert all the linked type layers at the same time. You can now flatten the contact sheet, if desired.